The DriveRack 4800/4820 offers wall-panel control utilizing the optional dbx Zone Controllers (ZC). Up to 12 controllers can be used to recall presets, adjust output or input level, provide output muting and source selection.
The ZC Configuration Wizard allows the user to quickly set up the ZC wall-panel controllers in a step-by-step manner for the DriveRack 4800/4820.
To access this section, select Tools from the Menu Bar. Then select Zone Controller Wizard.
Select Next to configure your zone controls.
Step 1 - Select the ID or input number 1-12 by clicking on it in the left-hand column. This ID number is set on the ZC itself and allows the DriveRack 4800/4820 to "read" its output. ID selection on the ZC is done by flipping one of the 6 DIP switches into the up position. If a ZC is to be set as #3, then the number 3 switch is flipped up. Since the ZC controllers only offer selections between 1-6, a selection of 7-12 is done by adding 6 to the number and then plugging into the 7-12 input on the back of the 4800/4820. For example, if the controller is to be numbered as #8, then the 2 switch should be put into the up position and then the CAT5 cable should be plugged into the 7-12 input on the back of the 4800/4820.
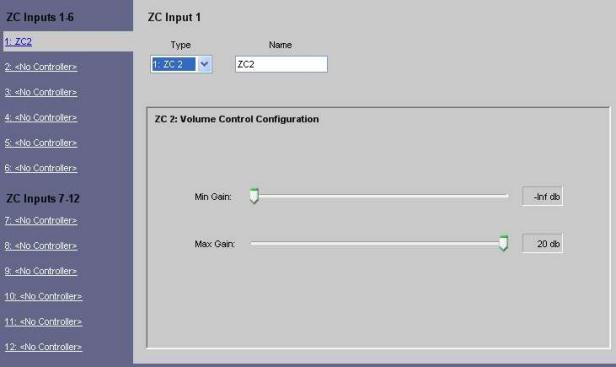
Step 2 - Select the ZC type of control that suites your need for each of the 12 possible Zone control input positions. The ZCs that can be used with the DriveRack 4800/4820 include the following:
The image below illustrates the selection of a ZC-2 as a Preset selector.
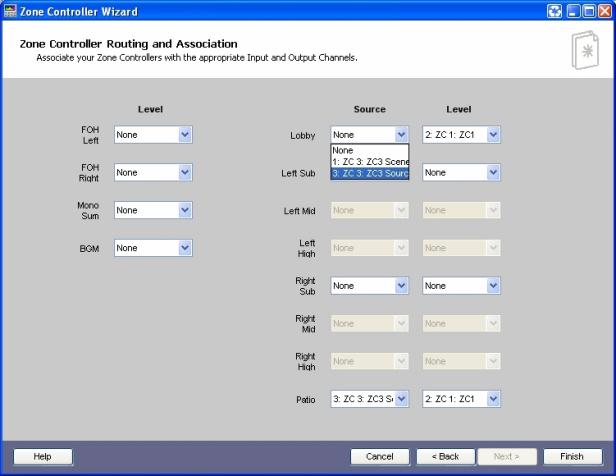
Step 3 - The final step is to choose the Input(s), Output(s), and/or Output Router that will be subscribing to which controller, then select Finish in the bottom right-hand corner to complete the setup. Below is an example showing the various pull-down menus that allow these locations in signal path to subscribe to the ZCs.