 Quick Start
Guide Quick Start
Guide
Quick Start
Guide Quick Start
GuideFor those of you familiar with HiQnet System Architect and/or BSS Soundweb London Architect, the following is a guide to get started with Audio Architect quickly and efficiently. It is recommended that you first familiarize yourself with the Audio Architect layout.
As a Quick Start, follow the steps below to get a basic idea of setting up, programming and running a venue in Audio Architect.
1. Open a New file. Select the Define Venue button in the Offline Design ribbon. Note that this will automatically insert a "Room 1" onto the venue workspace.
2.
Define Venue: Drag/drop Rooms from the
Venue Designer window onto the Venue and manipulate until you are satisfied
with your Venue design.
NOTE: Rooms may not be dragged onto other
Rooms. Font sizes, colors, and other appearances are edited in the Properties
window.
3. Add devices: Begin adding devices from the Devices window (right-click / drag to add multiple devices).
4. Program BSS London BLU devices: If you have added BSS London BLU devices in your venue, you will need to program them. For info on configuring BSS devices, CLICK HERE.
5. Route Audio: Other than standard analog signal routing, many HARMAN devices offer the handling of networked audio. These signals include BLU Link, CobraNet and Dante.
6. Associate Amplifiers: All Crown amplifier output channels must be associated with the rooms in which they are powering speakers.
7. Configure Monitoring: At this point in the workflow, your initial design should be completed.
8. Create Control Panels (Setup Motion Control if using iOS devices):
9. Go Online: At this point you should have all the devices in your design physically connected to their appropriate network and audio connection points.
IMPORTANT NOTE: For networking issues/troubles remember this - NetSetter is your best friend.
See the Launch NetSetter button in the Tools section of the Ribbon.
10. Tools. Setup Access Control, Scheduler, Logic Rules etc.
11. Run Venue. Operate the system.
To create a new Audio Architect file, open the program, click the File tab and select 'New'.
OPTIONAL; Import a venue image: Right-click on the Venue (not the Room) and select Frame/Image. This inserts a blank frame onto the Venue. Select the frame so that you see the handlebars around it. In the Properties window select the drop-down menu labeled "Background Image". This will bring up a "Select Image File" window where you will choose your background image. Once the image is inserted into the frame, use the handlebars to move and re-size it to fit your venue. (note: you may need to adjust the Properties window size in order to see this option.)

Whether or not you have imported an image to use as a template, you must still have Rooms in your venue to add devices into. Click the Define Venue button in the Workflow tab. Here you add Rooms to the workspace, resize them to fit your template (if you've added one), and create your venue.
Click the Add Devices button in the Workflow tab. In the left had window is the 'Devices' toolbox.
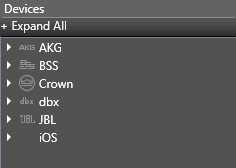
Select the devices you wish to add by clicking the arrow to the left of the Harman brand. This will expand the list, showing which devices are available within that brand. Click and drag a device onto the Room in which that device belongs. If you want to add multiple devices, right-click / drag the device and a menu will pop up providing a window to select multiple devices.
Continue this process until you have added all the devices required to all the Rooms in the Venue.
The BLU 800, 160 and 100 each have programmable processing. Programming these devices is beyond the scope of this Quick Start guide.
Please CLICK HERE for details on configuring the London BLU devices.
If you have London BLU or other devices that transmit and receive networked audio connected, these signals require special routing. Click here for more information on routing BLU link audio.
Associating amplifier channels with specific Rooms is a matter of selecting which amplifier channel you wish to associate to a Room. In the Venue Explorer and using the drop-down arrows, select the amplifier you wish to associate.
Here you organize your control panels for efficient viewing.
Control panels include controls, graphs and other information that help the end-user to control and view functions of hardware devices.
There are a few different types of control panels:
Factory Control Panels - subsets of controls from a device panel
Custom Panels - control panels with customized design and control over specific functions, controls, and devices
Group Panels - customized panels that link and group multiple channels from multiple devices
Custom Monitor Panels - customized panels that give users the ability to monitor selected devices
Master Control Panels - factory-defined panels that give users the ability to manage multiple like devices
Click the Go Online button in the Workflow section of the Offline Design Ribbon. From here you will Match Devices (see that Audio Architect is 'talking' to your devices, and Synchronize the Venue (send or receive programming to or from your devices).
Here you setup Access Control which provides various levels of access for different users, setup the system Scheduler, Logic Rules etc.
Click Run Venue and your system should be operational.